Getting Started on VALDI
On the VALDI dashboard, navigate to VALDI Direct by clicking the link in the VALDI Services panel or in the left-hand side navigation menu as shown in the screenshot.
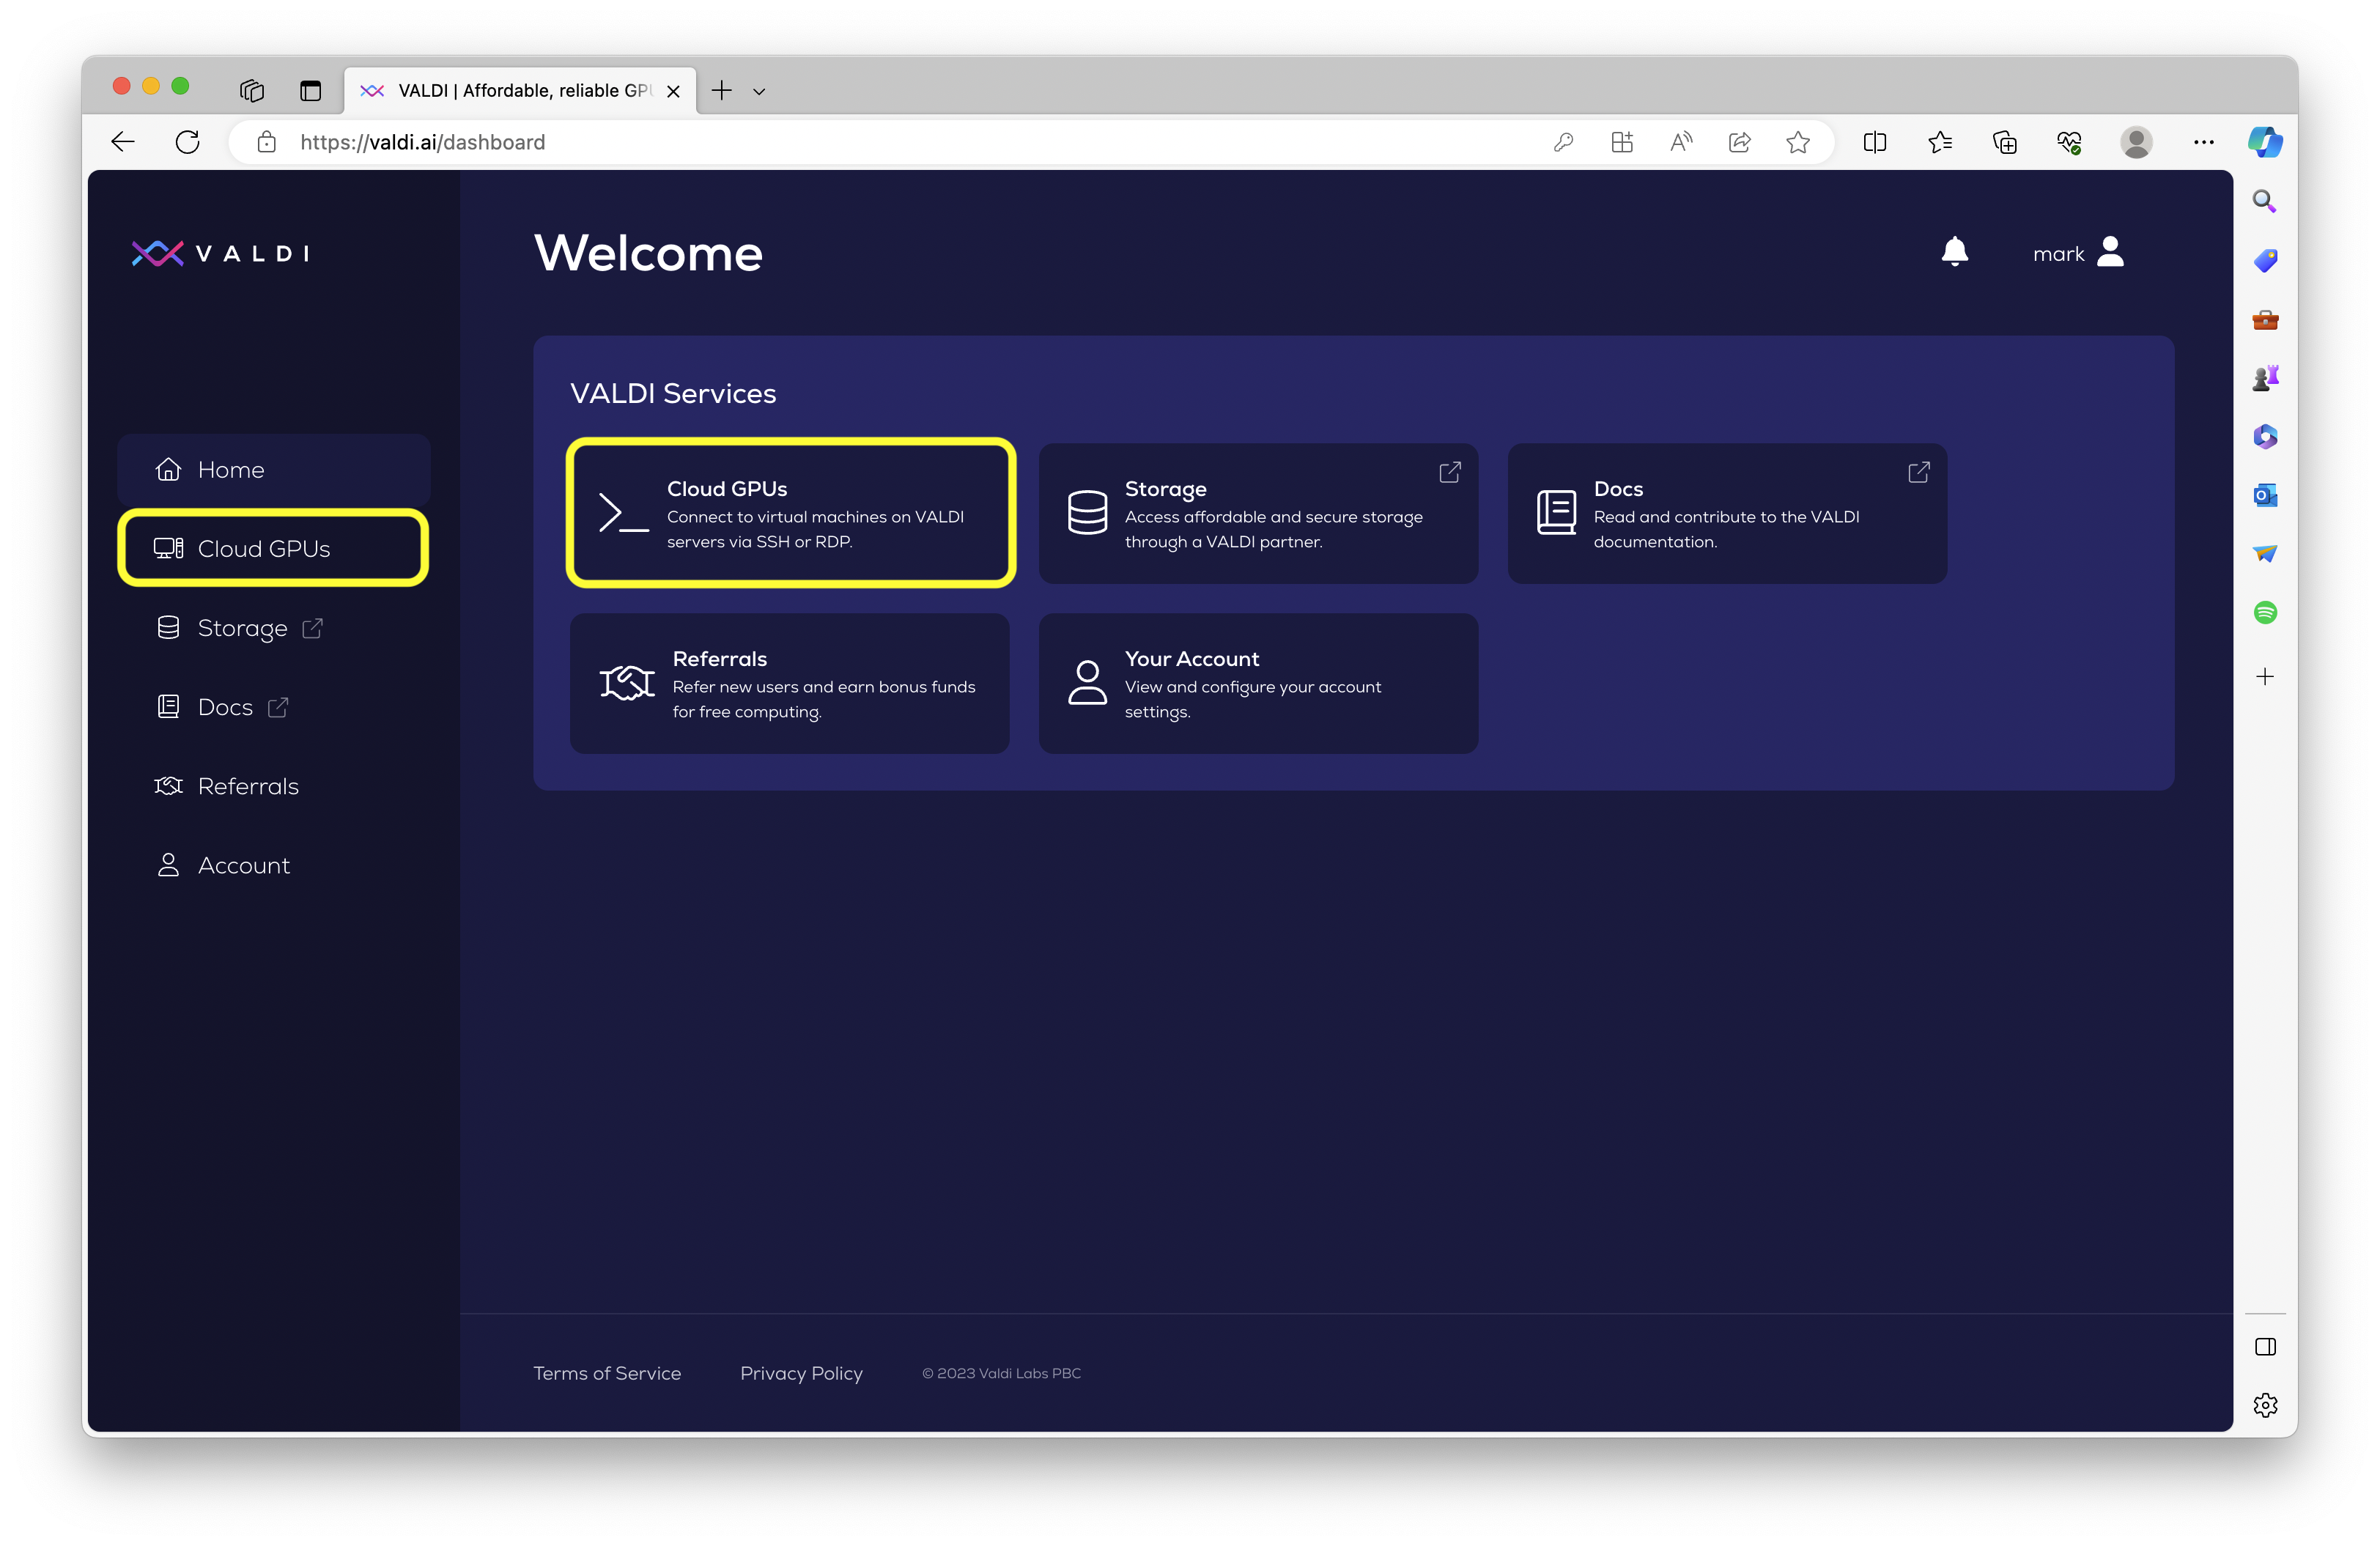
Choose from available GPUs
Once in VALDI Direct, you will see the list of available servers. Each server is a physical device containing some amount of CPUs, GPUs, RAM, and local storage. Each server's cost, physical location, and bandwidth, as well as the maximum available resources that can be allocated, are shown in each entry.
You can utilize a server by creating a Virtual Machine (VM). Start by selecting one of the servers in the list. Your choice of server will depend largely on your application and budget. NVIDIA A100s, for example, are cutting-edge chips optimized for AI training & inference, but they come at a relatively high price. Less intensive machine learning workloads may benefit from the A6000, A5000, or V100. Gamers, on the other hand, may be interested in our available selection of RTX 3090s and 4090s.
Configure your VM
Once you've determined the best choice of server for you, choose it from the list to begin configuring it.
Choose your VM's specs
Once you've selected a server from the list, you'll arrive at a screen similar to what's shown below.
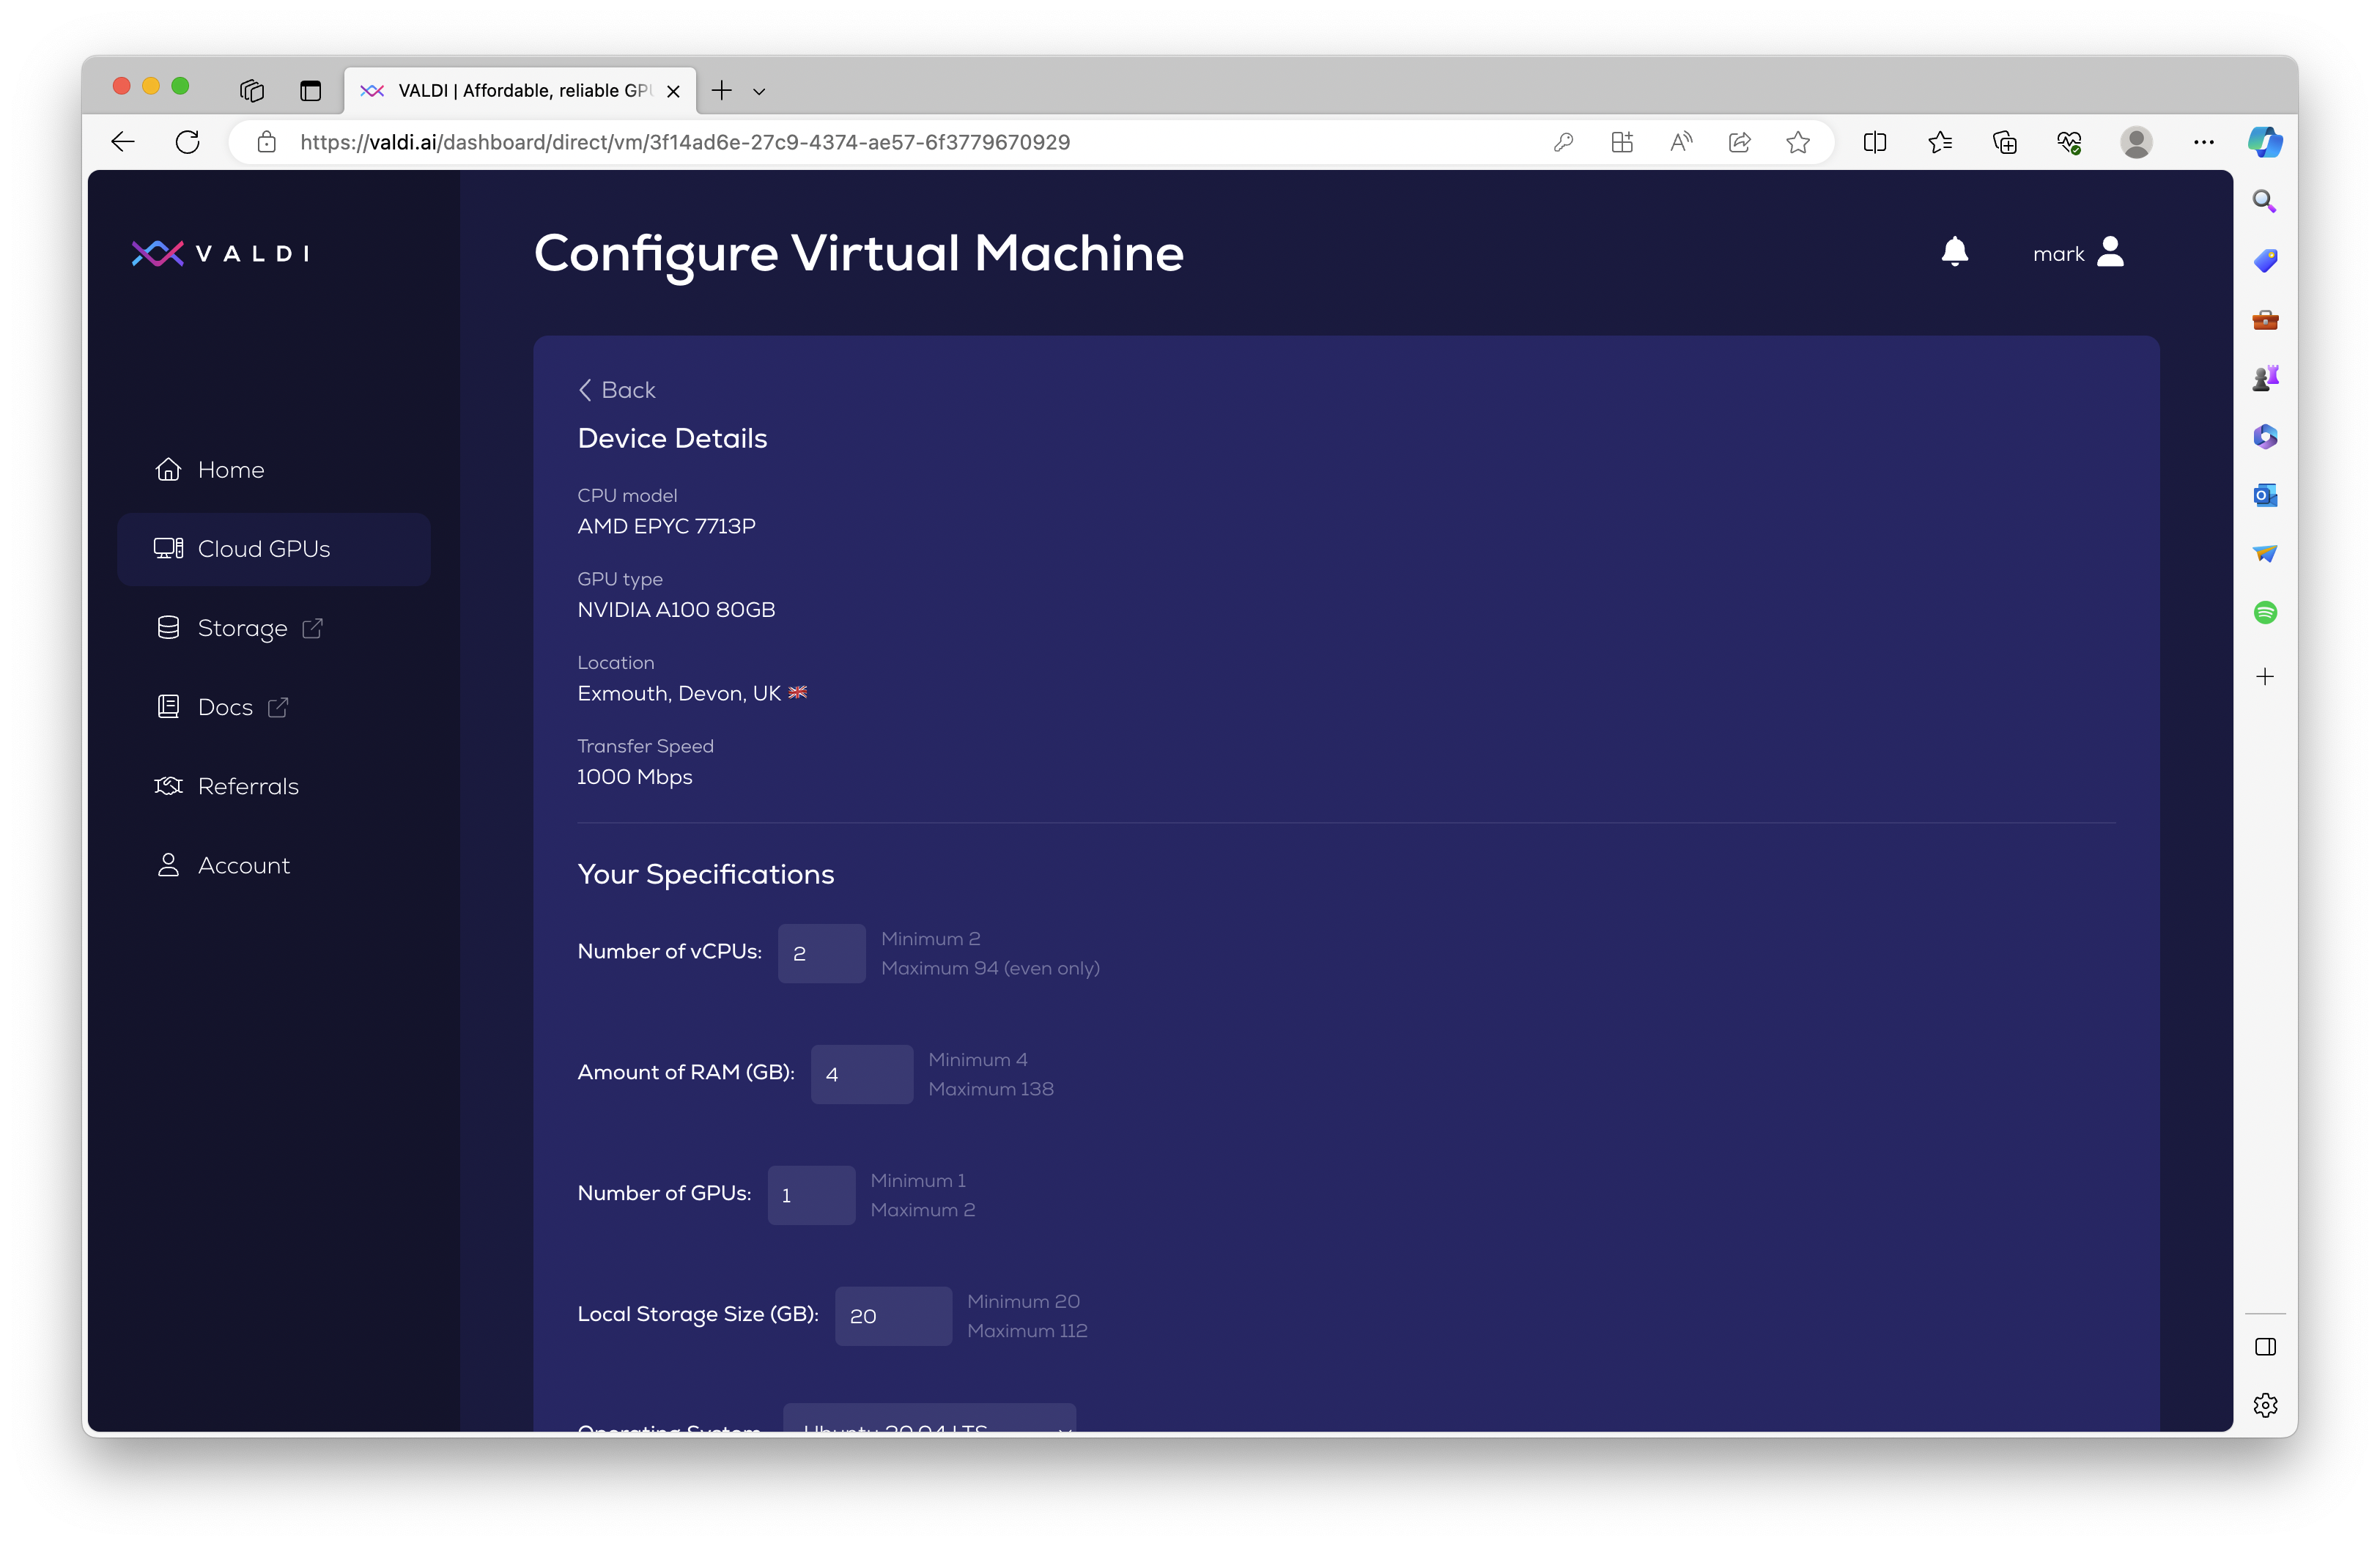
Under Your Specifications, you can set the following specs for your VM:
- vCPUs: The number of virtual CPUs. You must have at least 2, and the number of vCPUs has to be even. The maximum number of vCPUs available varies by server and how much of the server's resources are already allocated.
- RAM: The amount of RAM in GB. The minimum is 4 GB (or 8 for Windows VMs). As with vCPUs, the maximum available varies by server and current resource allocation.
- GPUs: The number of GPUs. The minimum is 1. Note that the GPU component has the largest impact on the overall cost of your VM.
- Storage: The amount of local disk space on the machine. Different OSes and flavors of OSes have different minimums. For example, you'll need at least 20 GB for Ubuntu, but at least 80 GB for Windows.
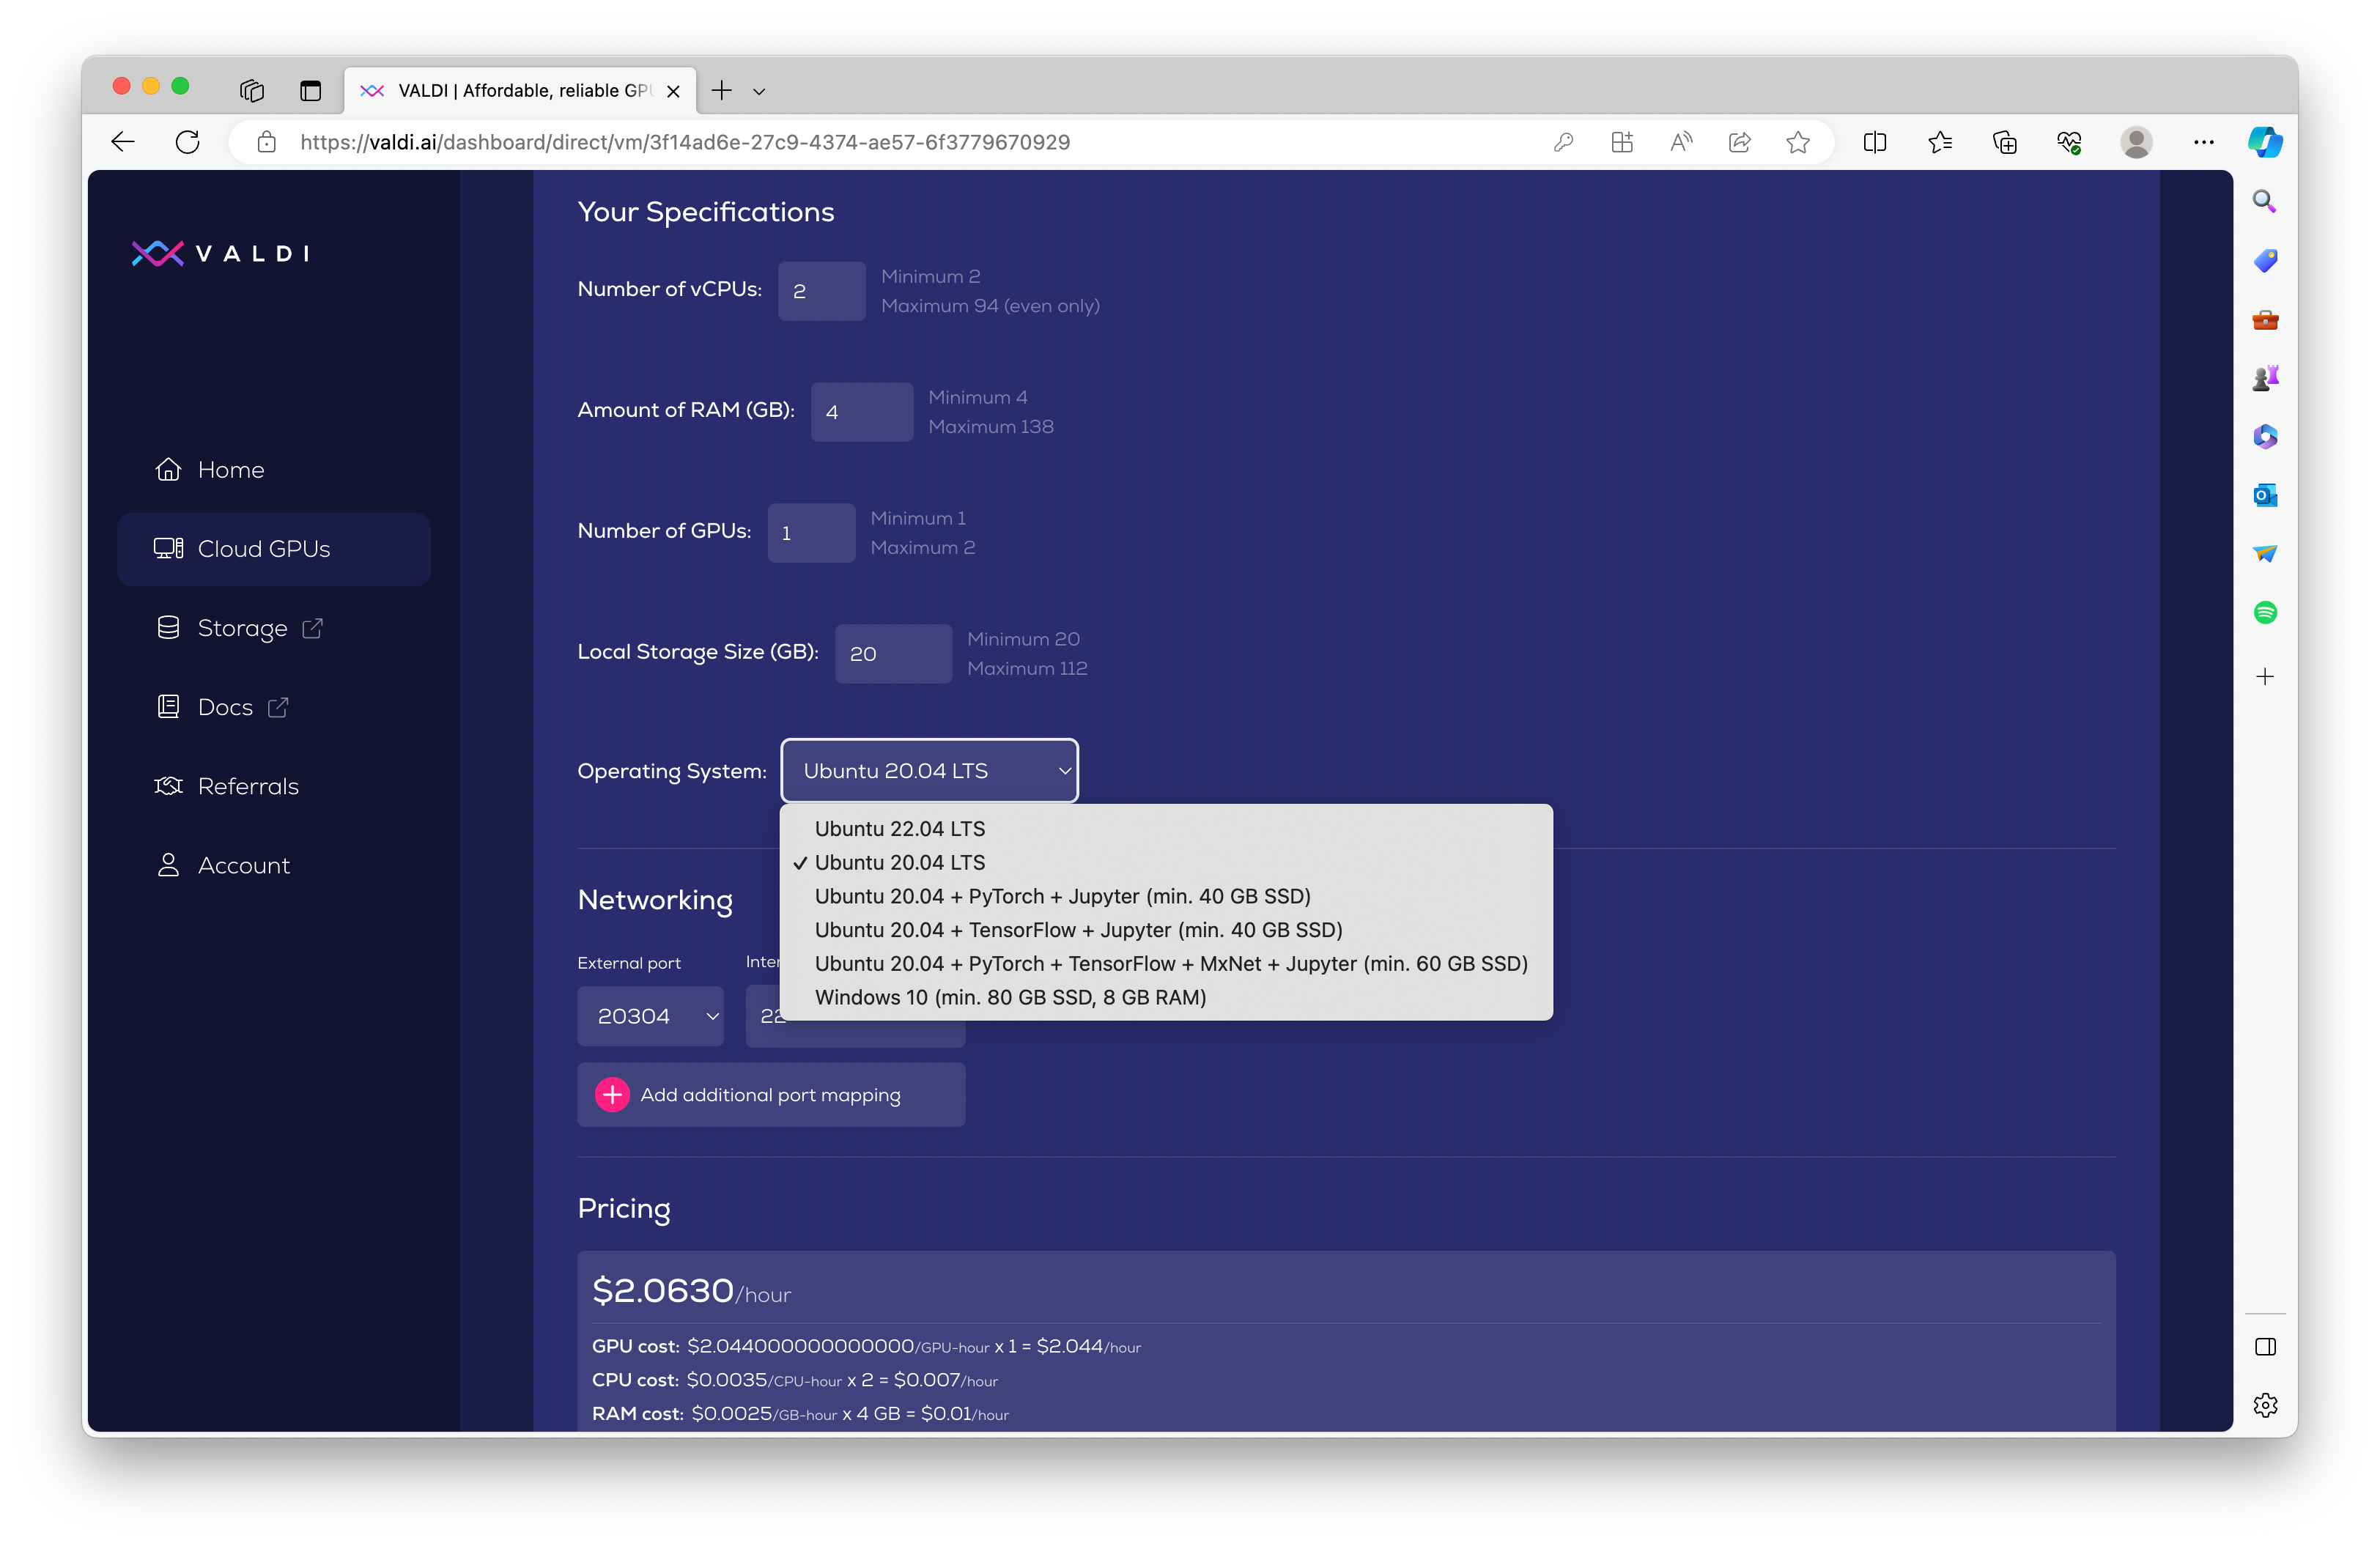
- Operating System: As shown in the screenshot below, VALDI has the following choices of operating systems:
- Ubuntu 22.04
- Ubuntu 20.04
- Vanilla
- including PyTorch & Jupyter
- including TensorFlow & Jupyter
- including PyTorch, TensorFlow, MxNet, & Jupyter
- Windows 10
The choice of operating system does not directly affect the cost of the VM, but the different flavors of OSes have different resource minimums for RAM and local storage.
Configure networking
Because of the way our servers are configured, direct server ports are not accessible publicly. Instead, ports have to be forwarded.
Under Networking, you can configure Port Forwarding to allow for different kinds of connections to your VM. For Ubuntu VMs, a port always has to be forwarded to 22 so that the VM can be accessed via SSH. For Windows VMs, a port always has to be forwarded to 3389 for Remote Desktop access. These will be automatically specified for you.
If you want to configure additional ports, choose an external port from the available ones in the drop-down list and then enter the port you want it to forward to internally. The screenshot below depicts how a user could configure four forwarded ports: 22 (e.g., SSH), 5432 (e.g., PostgreSQL), 443 (e.g., SSL/TLS), and 8888 (e.g., an arbitrary one, perhaps for testing a web app or API).
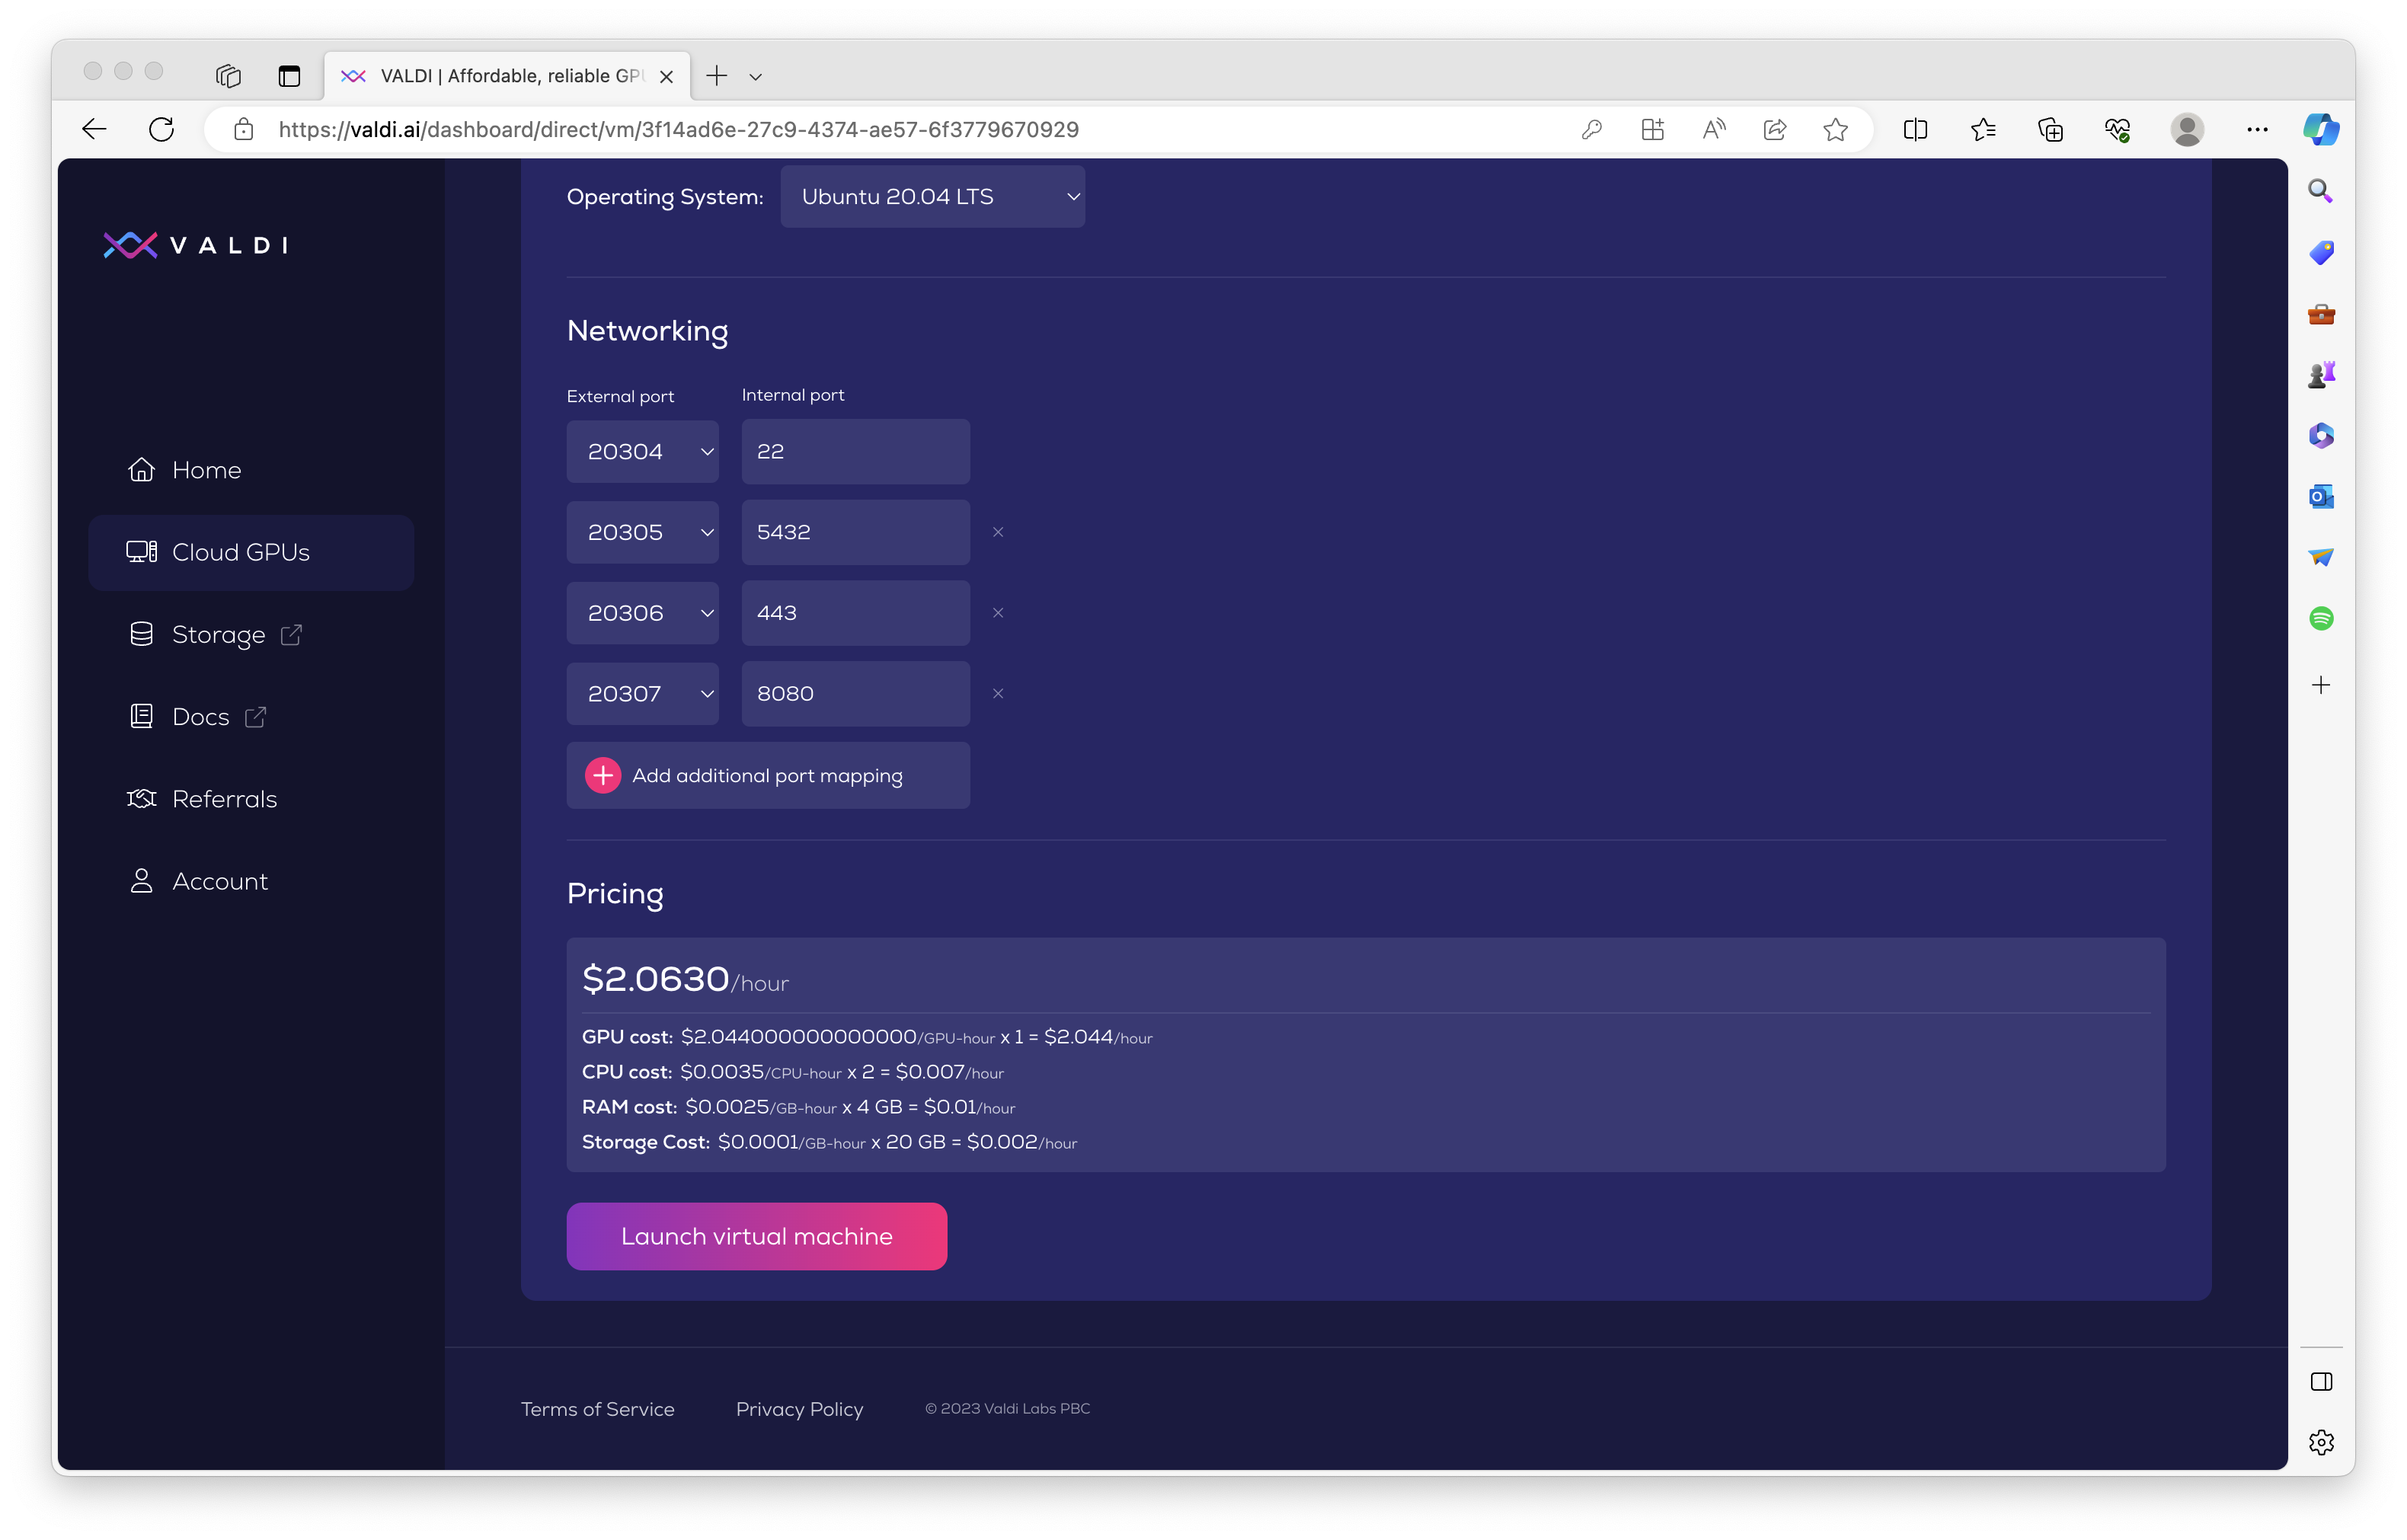
Check pricing
As shown also in the screenshot above, the total cost of your VM is the sum of the costs of the GPUs, CPUs, RAM, and storage. GPU costs vary, but CPU, RAM, and storage costs are the same across all servers.
Launch your VM
Click "Launch virtual machine" to spin up the VM you've configured. You'll be shown a final confirmation dialog. Click "Launch virtual machine" again.
Once the request has been processed, you will be shown a dialog that contains the access credentials (i.e., a temporary password). This is the only time you will be able to view this password, so make sure to copy it down before you close the dialog.
Note that your VM may not be accessible for up to 10-15 minutes after launch. Please be patient.
Access your VM
The process of accessing your VM varies between Ubuntu and Windows.
Ubuntu
If you're using any of the flavors of Ubuntu that VALDI offers, you'll use ssh to connect to your VM. Type the
following command in your computer's terminal:
ssh -p <ssh_port> user@<vm_ip_address>
This is the same command that was displayed to you in the confirmation dialog after launching your VM. It will also work on Windows if you are using the Windows Subsystem for Linux (WSL). Otherwise, you can use a software like PuTTY or Cygwin.
If you are presented with a message like the following, type "yes" and press Enter.
ED25519 key fingerprint is SHA256:hwyDK67xdYC3Mt7PkFovvXdXvYLq3CNKITIsolZaR20.
This key is not known by any other names
Are you sure you want to continue connecting (yes/no/[fingerprint])?
You will then be prompted for the temporary password that was presented to you when you launched the VM.
Troubleshooting
Remote host identification has changed
In some cases, you may receive an error message like below when you try to SSH to your VM.
@@@@@@@@@@@@@@@@@@@@@@@@@@@@@@@@@@@@@@@@@@@@@@@@@@@@@@@@@@@
@    WARNING: REMOTE HOST IDENTIFICATION HAS CHANGED!     @
@@@@@@@@@@@@@@@@@@@@@@@@@@@@@@@@@@@@@@@@@@@@@@@@@@@@@@@@@@@
IT IS POSSIBLE THAT SOMEONE IS DOING SOMETHING NASTY!
Someone could be eavesdropping on you right now (man-in-the-middle attack)!
It is also possible that a host key has just been changed.
The fingerprint for the ED25519 key sent by the remote host is
SHA256:tRjxhLfacPsaX7FqXOPVE4YTrDd/g7nNtmUnyUftKYs.
Please contact your system administrator.
Add correct host key in /Users/adminuser/.ssh/known_hosts to get rid of this message.
Offending ECDSA key in /Users/adminuser/.ssh/known_hosts:501
Host key for [103.245.9.186]:16002 has changed and you have requested strict checking.
Host key verification failed.
This occurs because, as a safety mechanism, SSH automatically stores a "fingerprint" of the servers you SSH into. When a new VM is created on VALDI and hosted at the same IP address as one of your old VMs, the server's fingerprint changes. SSH (rightly) sees an IP address that it's familiar with, but which is now matched with a different server than before. There are two solutions to this:
- Delete any instances of the server's IP address from your
~/.ssh/known_hostsfile. - Use the following SSH command to bypass the security mechanism
ssh -o UserKnownHostsFile=/dev/null -o StrictHostKeyChecking=no -p <ssh_port> user@<vm_ip_address>
Connection refused
ssh: connect to host 216.75.232.242 port 60000: Connection refused
This error is very common if you try to SSH to the server before it finishes provisioning. Wait a few minutes and try again.
Network is unreachable
ssh: connect to host 216.75.232.242 port 60000: Network is unreachable
This error is also common if you try to SSH to the server before it finishes provisioning, but it typically happens at a later stage of the provisioning process than "Connection refused". Wait a few minutes and try again — your VM is likely very close to being ready.
Windows
To access a Windows machine, you will use Microsoft Remote Desktop.
Open the Microsoft Remote Desktop application on your computer and add a new PC. For PC name, enter the IP address followed by a colon, followed by the external port which forwards to 3389. For example, if your VM's IP address is 1.2.3.4 and the external port forward to 3389 is 8080, the PC name you enter would be:
1.2.3.4:8080
Add the PC and double click it to connect. When prompted, enter the password that was presented to you when you launched your VM.
Gamers might consider setting up Parsec or similar for a smoother remote connection.
Running a Jupyter notebook
If, when you launched your VM, you selected one of the Ubuntu installations with Jupyter and other tools preinstalled, you can follow these instructions to run the notebook.
- SSH into your VM.
- You will see the default Jupyter notebook in your home directory:
~/Welcome.ipynb - Run the following command to launch the notebook:
jupyter notebook --no-browser --port=8888 --ip=0.0.0.0 - The logs printed to the screen will output a URL similar to the following:
http://127.0.0.1:8888/?token=f91c3ce5f65f8201aeb41ee7bb4e845657a4705cda501017 - Copy the URL, replace
127.0.0.1with your VM's IP address and replace8888with the port that is being forwarded to 8888 (you can find this information in the VALDI dashboard under your running VM's details). - Paste the URL into your web browser.
- Click on
Welcome.ipynb. - Use your Jupyter notebook! 😃
Stop your VM
You can stop your VM, retain your data, and pay only for storage. To stop a VM, navigate to it under "Your Virtual Machines" in VALDI Direct, then scroll to the bottom and click the gray "Stop this VM" button. After confirming, your data will be retained and you will be billed only for storage.
Be advised that other users can claim the server's GPUs, CPUs, and RAM while your VM is stopped. If sufficient resources to restart your VM are not available, you will need to wait for them to free up before you can restart the VM. Your data will be retained and is inaccessible to other users.
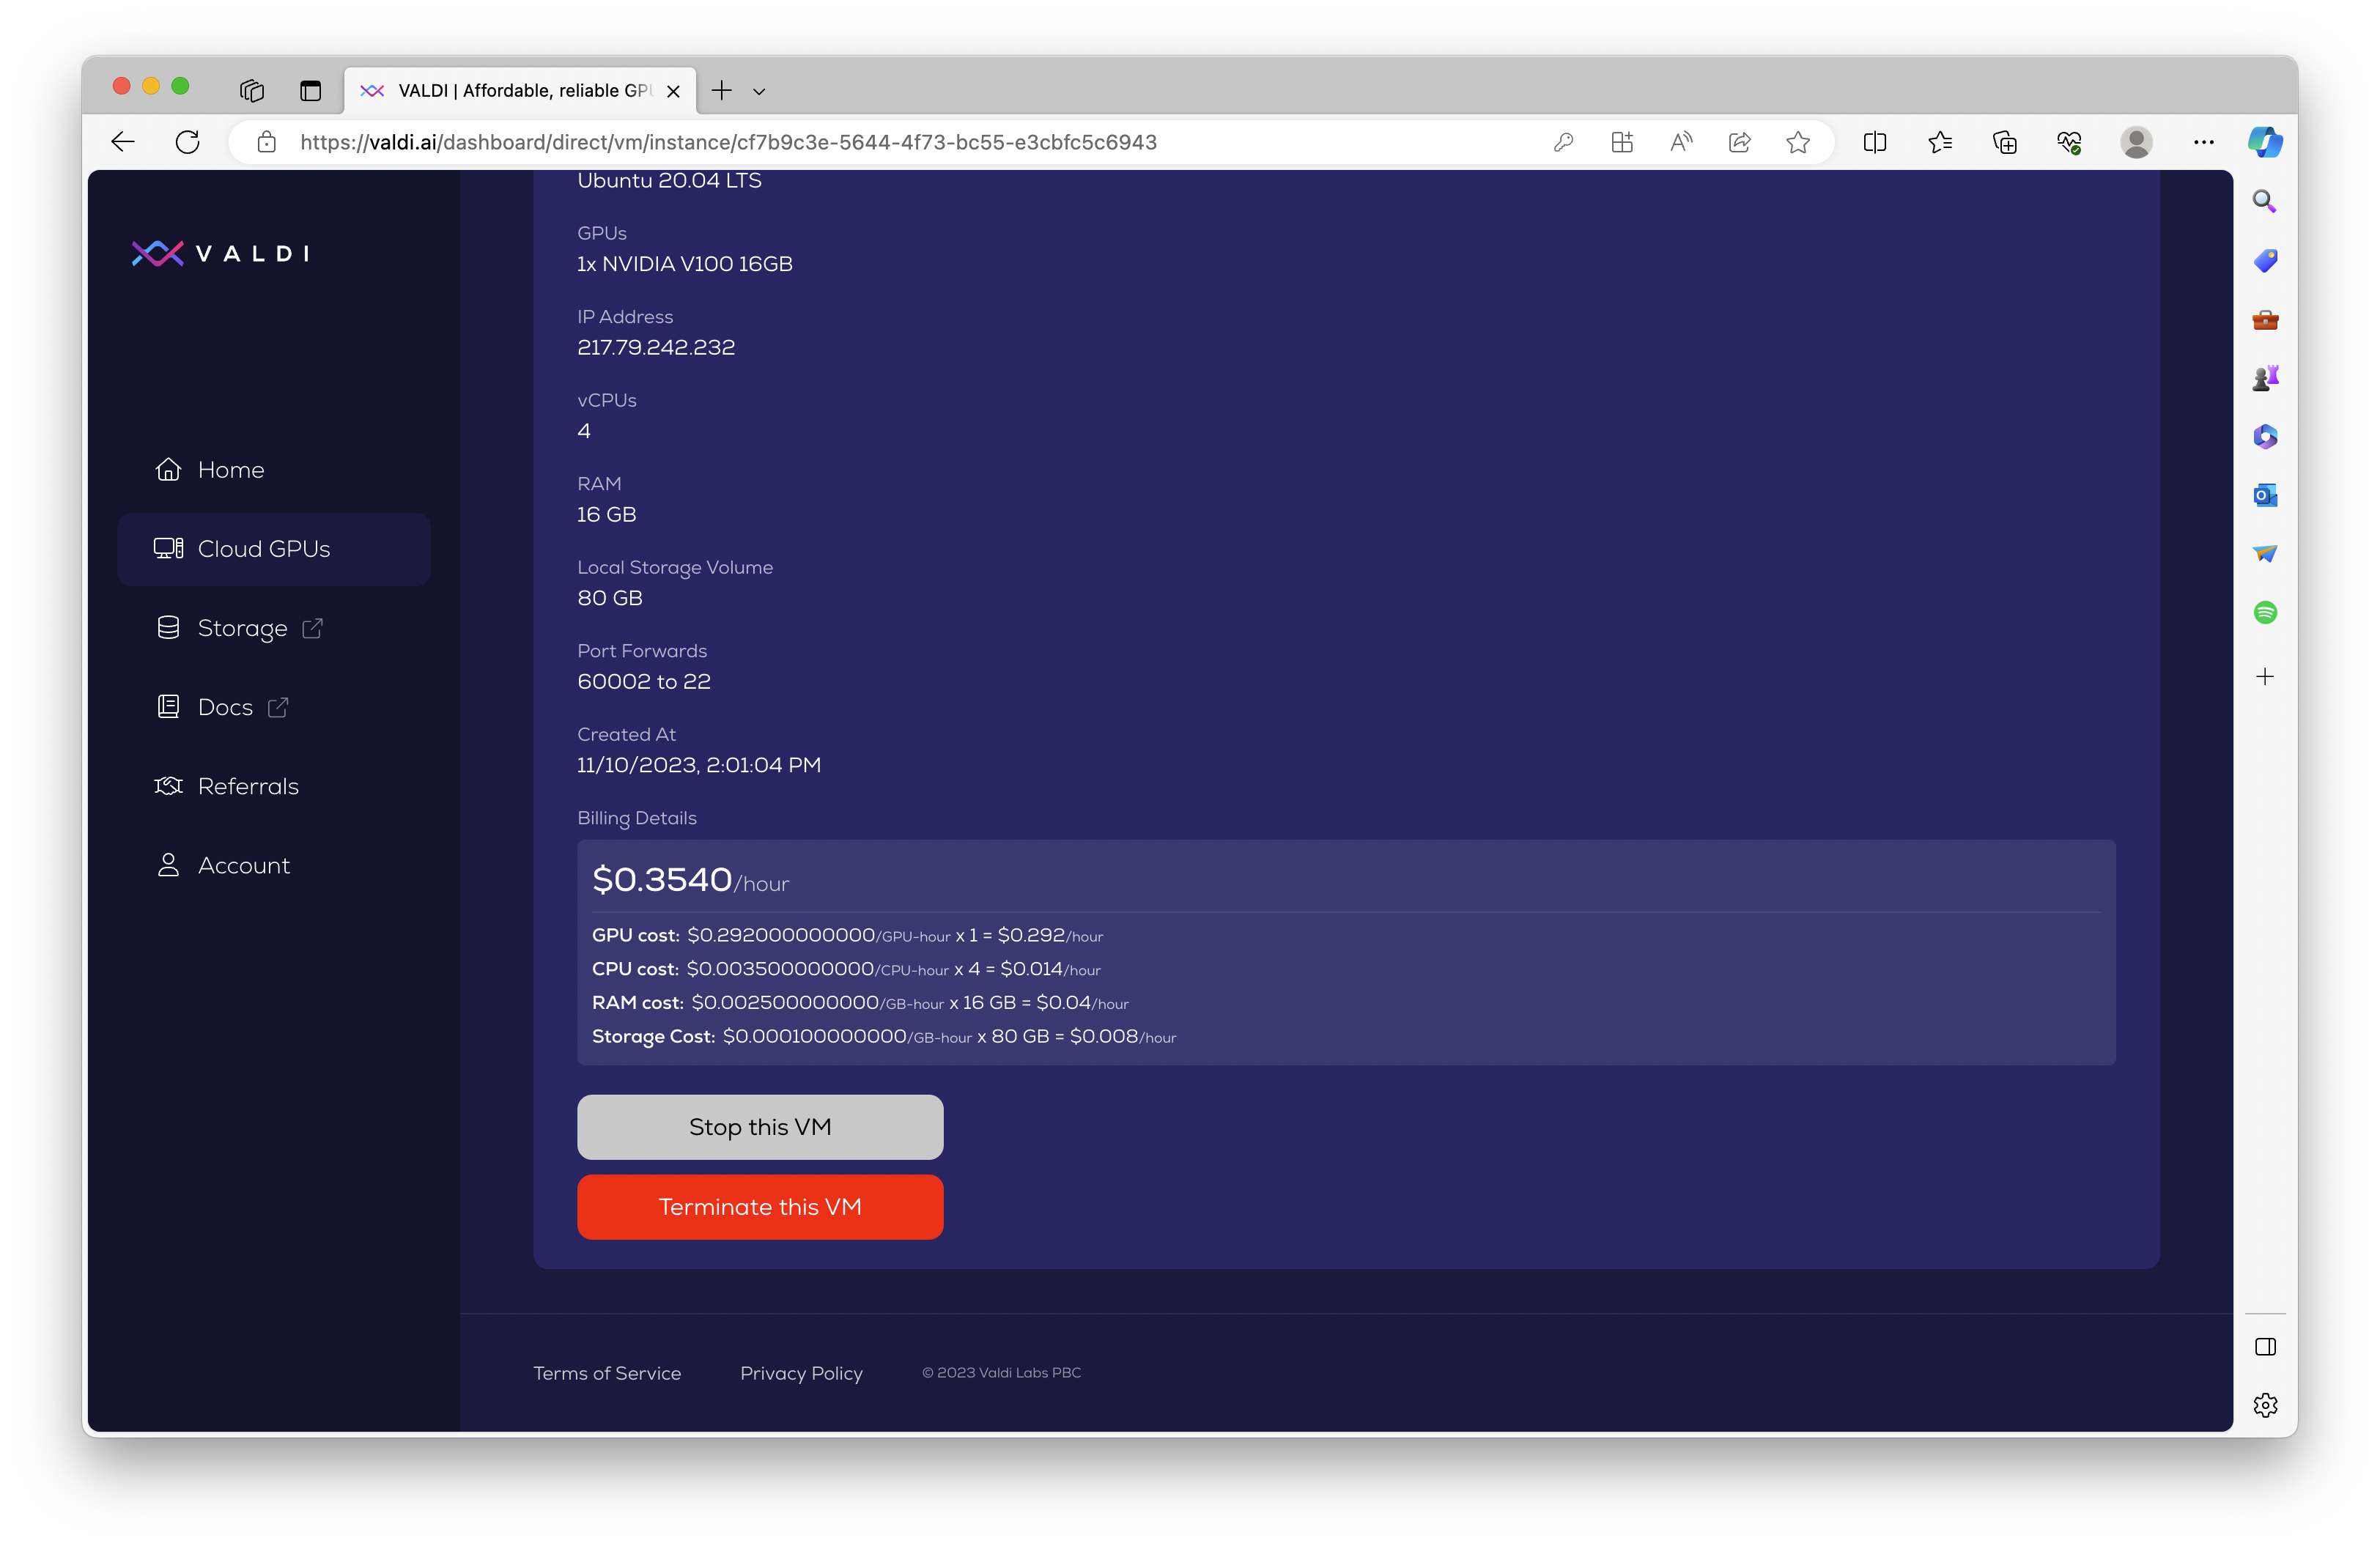
Terminate your VM
To permanently delete your VM and stop all billing charges, navigate to it under "Your Virtual Machines" in VALDI Direct, then scroll to the bottom and click the red "Terminate this VM" button. After confirming, your VM and data will be permanently deleted and billing will stop. This action is irreversible.